
Ceramic Tile Backsplash for Kitchen: Installation and Care Tips
Look at your kitchen walls after a week of normal cooking. See those grease marks? The stubborn sauce splatters? Moisture seeping in behind the paint? Your walls are quietly deteriorating every single day. A properly chosen backsplash doesn’t just protect—it transforms vulnerable drywall into armor that laughs at whatever your busiest dinner prep throws at it. What you’re about to read cuts through the noise: real material guidance, installation techniques that actually work, and maintenance habits so simple they won’t eat your weekends.

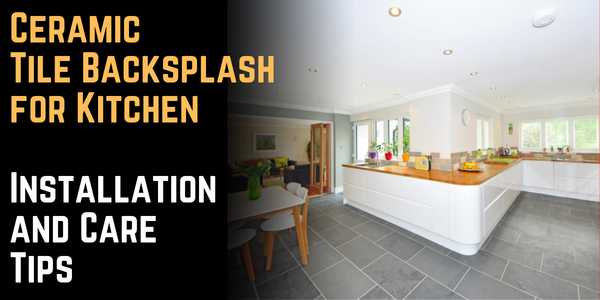
Why Ceramic Tile Backsplashes Work in Actual Daily Kitchens
Here’s what you need to understand before browsing tile samples or gathering tools. Industry research shows 61% of kitchen backsplashes are expected to utilize ceramic or porcelain tile over the next three years (kb.nkba.org). That statistic isn’t random—it reflects years of homeowners discovering what genuinely holds up.
A ceramic tile backsplash survives conditions that destroy paint, adhesive panels, and even certain glass products within months. Direct stovetop heat? Ceramic doesn’t warp or fade. Water splashes? They bead right off glazed surfaces instead of soaking into your wall structure. You’ll discover options ranging from timeless subway patterns to zellige-inspired character pieces and artisan-style finishes.
Let’s get practical about cost. Ceramic typically runs cheaper than porcelain and performs beautifully on vertical surfaces where nobody’s walking. Porcelain makes sense for extreme moisture zones or when you need absolute indestructibility, but ceramic handles standard kitchen realities without breaking a sweat. The return on investment is straightforward—installing a ceramic tile backsplash for kitchen spaces refreshes your entire room’s aesthetic without the budget drain and upheaval of gutting everything, and prospective buyers definitely take notice during walkthroughs.
TRANSITION 1: You’re sold on ceramic’s combination of toughness and visual flexibility. Next up? Design choices that prevent costly regrets before your first tile is even cut.
Planning Your Ceramic Tile Backsplash Design (Skip This, Regret It Forever)
Strategic planning is what separates “wow, that looks professional” from “I have to stare at uneven grout lines for ten years.”
Layout choices that determine your finished appearance
Most backsplashes run from countertop to upper cabinets—typically around 18 inches. But extending the tile full-height to your ceiling? That’s how you create genuine drama in modern kitchens. Concentrate your most eye-catching tiles behind the range and sink, because that’s where human attention naturally falls. Think hard about outlet placement. Symmetrical positioning prevents those annoying thin tile fragments that scream amateur hour and snap during cutting.
Picking tile beyond just matching your paint color
Matte finishes hide fingerprints and water marks way better than glossy ones, though high-gloss tiles bounce light wonderfully in dimmer kitchens. Rectified edges let you achieve those tight grout lines that read contemporary; cushioned edges require wider spacing. Here’s a mistake to avoid: highly textured or three-dimensional tiles near your cooktop become grease magnets, and cleaning every tiny crevice gets old fast.
Your grout color decision (this makes or breaks everything)
Light grout broadcasts every marinara accident but delivers that seamless, expansive feeling. Dark grout camouflages stains like a champ yet creates bold grid patterns that can visually overwhelm smaller tiles. For subway layouts, 1/8-inch grout lines look sharp; mosaic installations need tighter 1/16-inch spacing. Epoxy grout resists staining better than cement versions but demands higher skill during installation and costs more upfront.
TRANSITION 2: Your layout’s finalized, tile finish selected, grout color locked in. Now comes wall prep—because even luxury tile performs miserably over poorly prepared surfaces.
Surface Preparation Checklist for Installation That Actually Lasts
Ask any pro: kitchen backsplash installation success depends far more on preparation than tile brand. Your walls must be flat, spotless, and bonding-ready.
Getting your wall condition right (flat, clean, stable matters)
Shiny paint repels adhesive, so lightly sand it and eliminate grease buildup with TSP cleaner. Patch any drywall dents with joint compound and sand everything smooth—even minor bumps show through thin tiles and create wavy visual lines. Installation standards require proper mortar coverage to reach at least 95% with no voids exceeding 2 square inches and no voids within 2 inches of tile corners (ceramictilefoundation.org). Cement backer board usually isn’t needed for typical backsplashes unless you’re dealing with serious wall damage or direct water spray zones.
Dealing with countertops, cabinetry, and expansion gaps
Always leave a small gap (roughly 1/8 inch) where tile meets your countertop—this allows natural material expansion and contraction without cracking. Protect new countertops using cardboard plus painter’s tape to avoid scratches from tools or sharp tile edges.
Electrical considerations and code compliance
Kill power at your breaker box before working anywhere near outlets. You’ll almost certainly need outlet extenders to bring receptacles flush with your new tile surface—skip these and your cover plates won’t sit properly against the wall.
TRANSITION 3: Perfect prep accomplishes nothing without matching your tools and adhesives to your specific tile dimensions and kitchen environment—here’s your exact shopping list for professional-quality results.
Installing Your Ceramic Backsplash Step by Step (Straight Lines, Zero Waste)
Time to tackle how to install ceramic backsplash using methods that eliminate typical DIY headaches.
Dry layout plus reference lines (the step beginners skip, then regret)
Before mixing a single batch of adhesive, lay tiles out on your counter to preview your pattern and spot where cuts will land. Measure and mark a perfectly level reference line on your wall—never assume your countertop is level, because it almost certainly isn’t. Center everything so you avoid ending up with tiny tile fragments at one edge.
Setting tiles with uniform spacing
Apply thinset adhesive in manageable sections using a notched trowel appropriate for your tile size (1/4-inch notches suit most backsplash applications). Press each tile firmly using a slight twist motion and insert spacers to keep gaps consistent. Slide a straightedge across multiple tiles checking for flatness without high or low spots. Let everything cure a minimum 24 hours before grouting—rushing this phase guarantees cracked grout lines down the road.
TRANSITION 4: Tiles are set, adhesive has properly cured—grouting comes next, the step that either seals in a perfect finish or introduces stains and clouding you’ll see every morning.
Keeping Your Kitchen Backsplash Looking Showroom-Fresh
Installation marks the starting line. Smart kitchen backsplash care tips stop the gradual buildup that transforms gorgeous tile into something dingy and neglected.
Your daily and weekly routine (quick and safe)
Wipe your backsplash immediately after cooking while surfaces remain warm—grease hasn’t bonded yet. Grab a soft microfiber cloth with warm water and one drop of dish soap. Seriously, that’s all you need on most days.
Tackling grease, splatters, and sticky messes
When things get tougher, cleaning ceramic tile backsplash zones demands slightly more effort but nothing crazy. Combine dish soap with warm water or grab a pH-neutral tile cleaner designed for glazed ceramic. Steer clear of abrasive powders and steel wool that scratch glazed finishes. Combat oil film by spraying mild degreaser, waiting two minutes, then wiping clean with a damp cloth.
Tomato sauce and turmeric stains respond well to baking soda paste—spread it, wait ten minutes, then gently scrub using a soft brush. For glossy tiles, dry using a clean towel to eliminate water spots and restore that shine.
Your grout care system (where maintenance really lives)
Grout demands monthly attention with a soft brush and proper cleaner. Combine oxygen bleach with water for gentle yet effective grout scrubbing that won’t harm colored grout. Mildew loves damp zones near sinks, so keep those areas especially clean. Reseal cement-based grout every 12-18 months—test by dripping water on it; if it absorbs instead of beading, you’re due for resealing.
TRANSITION 5: Despite careful maintenance, backsplashes sometimes develop problems like hollow-sounding tiles, cracked grout, or persistent stains—here’s how to diagnose and repair common issues without ripping everything out.
Installation Mistakes That Come Back to Haunt You
|
Mistake |
Why It Happens |
How to Prevent It |
Fix Difficulty |
|
Wavy tile lines |
Unlevel countertop or no reference line |
Establish level starting line with laser |
Medium – may require partial redo |
|
Grout cracking at countertop |
Rigid grout in movement joint |
Use flexible caulk instead of grout |
Easy – remove grout, apply caulk |
|
Hollow-sounding tiles |
Insufficient thinset coverage |
Use proper trowel size and back-butter tiles |
Hard – requires tile removal |
|
Outlet plates don’t sit flush |
Forgot outlet extenders |
Measure tile thickness and order extenders |
Easy – install extenders post-project |
Common Questions About Ceramic Backsplashes, Answered
Is ceramic tile good for a kitchen backsplash behind the stove?
Absolutely. Ceramic handles stovetop heat without issues. Your real concern? Choose glazed tile that won’t soak up grease splatters. Matte finishes perform fine but demand more frequent cleaning than glossy surfaces in high-heat cooking zones.
Should mastic or thinset be used for a ceramic tile backsplash?
Thinset mortar wins for kitchen backsplashes. Stronger bond, superior moisture handling, and it won’t soften from cooking heat. Premixed mastic can work for light-duty spots away from direct heat and moisture exposure.
How often should grout be resealed on a kitchen backsplash?
Cement-based grout needs resealing every 12-18 months depending on your cooking frequency. Epoxy grout doesn’t require sealing whatsoever. Test your grout by dropping water on it—quick absorption means you’re overdue for sealer.
Finishing Your Backsplash Project Right
A properly installed ceramic tile backsplash shields your walls while dramatically elevating your kitchen’s visual appeal without the mayhem of complete renovation. Success boils down to meticulous planning, patient installation, and regular maintenance that takes minutes instead of hours. Never rush prep work or cut corners on curing times between steps—those shortcuts invariably surface later as fractured grout or loosening tiles. With appropriate care, your backsplash delivers fantastic looks for decades while handling whatever your most intense cooking sessions dish out.

